FIRST USE & SETUP
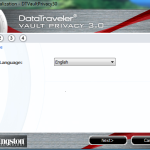
The first time you plug the USB flash drive into your system, you will notice that a rather small drive will show up in Computer under Removable Storage. When you open up this drive, you will be greeted by an initial setup. The first couple images are your standard selections for language preference and ignoring the user agreement. The third step requires you to pick your device’s password, and hint. The fourth step let’s you type in your name, company and role.
Pressing finish on the last step formats the drive, and gives you access to your newest drive found in Removable Storage.
After that, your drive is set up and ready for use. We immediately headed over to the folders found in the drive’s directory, where we took a look at the Anti-Virus software provided by ESET. To use the Anti-Virus, it’s as simple as pressing the small search glass icon in the bottom left hand corner and leaving the drive to do the rest.
THE SSD REVIEW TESTING PROTOCOL
At The SSD Review, we test our storage devices slightly different depending upon the device’s marketed purpose. Our goal is to test in a system that has been optimized with our SSD Optimization Guide, however CPU C State alteration may or may not have occurred depending on the motherboard and BIOS configurations. Benchmarks for our tests are that of fresh devices, so that we can verify that the manufacturer’s specifications match the device. Additionally, we also try to include links to the benchmarks used in our report so that you as the reader can replicate our tests to confirm that your device is top-notch.
This Test Bench build was the result of some great relationships and purchase; our appreciation goes to the below mentioned manufacturers for their support in our project. All of the components we use for testing and evaluation can be easily purchased at a relatively affordable price. The links provided below can assist in pricing, as well as availability for those of you who may find interest in our equipment.
| PC CHASSIS: | InWin 901 Mini-ITX Chassis |
| MOTHERBOARD: | ASUS P8H77-I Mini-ITX |
| CPU: | Intel i7 2600 CPU |
| CPU COOLER: | Corsair H80 CPU Cooler |
| POWER SUPPLY: | Cooler Master M2 Silent Pro 850W |
| SYSTEM COOLING: | Corsair Chassis Fan |
| MEMORY: | Crucial Ballistix Tactical Tracer 1600 MHz |
| GRAPHICS CARD: | EVGA NVIDIA GeForce GTX 560 Ti |
BENCHMARK SOFTWARE
The software used for today’s analysis is typical of many of our reviews and consists of Piriform Speccy, ATTO Disk Benchmark, Crystal DiskMark, AS SSD and Quickbench. In consumer reports, we prefer to test with easily accessible software that the consumer can obtain, and in many cases, we even provide links. Our selection of software allows each to build on the last and to provide validation to results already obtained.
PIRIFORM SPECCY
Piriform Speccy is a great tool for checking the status and health of your computer system. It provides you with brief summary, or a detailed look, at your operating system, CPU, RAM, motherboard, graphics, storage, optical drives, audio, peripherals and network.
Speccy shows us that the DataTraveler Vault Privacy 3.0 has a total amount of 30.8 GB for it’s capacity, and when formatted returns 28.7 GB as actual usable space. The decreased usable capacity is due to the encryption and Anti-Virus software that is installed on the device.
 The SSD Review The Worlds Dedicated SSD Education and Review Resource |


I see that it can supposedly be switched to read-only mode. Is this done through a hardware switch, or is it done through software? If the latter, what’s to prevent malware from flicking the switch?